Drizzle ORM is a TypeScript-first ORM that provides a simple way to define database schemas, execute queries, and manage migrations. When combined with Neon's branching capabilities, you can establish a reliable workflow for developing, testing, and deploying schema changes.
This guide will walk you through:
- Setting up your environment to use Neon branches with Drizzle.
- (Optional) Introspecting an existing database schema into Drizzle.
- Defining your schema and generating migration files using Drizzle.
- Two distinct methods for applying migrations: via
drizzle-kit migrateand a custom migration script. - Applying migrations to your
developmentbranch for testing. - Promoting those migrations to your
productionbranch.
Prerequisites
Before you begin, ensure you have the following:
- A Neon account. If you do not have one, sign up at console.neon.tech/signup.
- A Neon project. Newly created projects come with
production(default) anddevelopmentbranches. - Node.js and npm installed on your local machine.
- Neon CLI (optional but recommended for managing branches and connection strings quickly from the terminal).
Setting up your Neon Project and Branches
Initialize your Neon Project
If you haven't already, log in to the Neon Console and create a new project. By default, new Neon projects are created with two branches:
production: Your primary database branch.development: A branch intended for development and testing
Retrieve Connection strings
You'll need separate connection strings for your production and development branches.
Direct connection for migrations
Neon supports direct and pooled database connections. While pooled connections are excellent for application runtime, they can cause issues with schema migrations due to session-level configurations or transaction behaviors. Always use a direct (non-pooled) connection string when performing migrations. Use pooled connections for your application runtime to benefit from connection pooling (allowing more concurrent connections) and performance optimizations. For more information about direct and pooled connections, see Connection pooling.
In the Neon Console:
- Navigate to your project's Dashboard.
- Click the Connect button to open the connection details modal.
- Select the
productionbranch from the dropdown for the Branch field.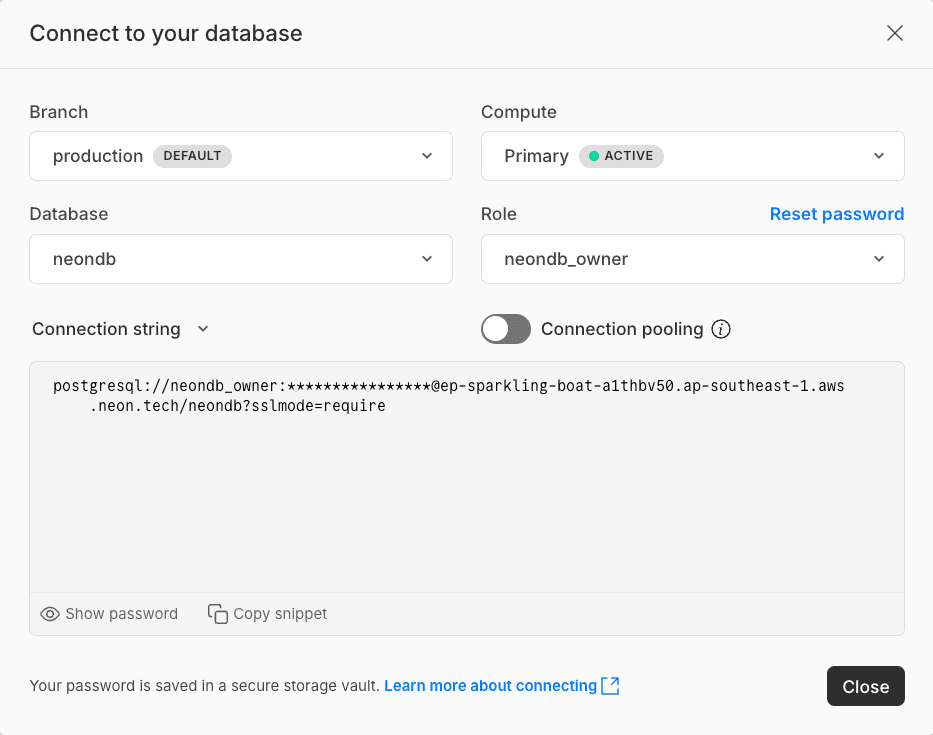
- Additionally, chose the Database and Role you want to connect with.
- Copy the direct connection string by turning off the Connection pooling toggle. This will provide you with a direct connection string.
- Repeat steps 2-5 for your
developmentbranch.
Your connection strings will look similar to this:
# Development branch connection string
postgresql://[database_user]:[user_password]@ep-[dev-endpoint-id].[region].[aws/azure].neon.tech/neondb?sslmode=require

# Production branch connection string
postgresql://[database_user]:[user_password]@ep-[prod-endpoint-id].[region].[aws/azure].neon.tech/neondb?sslmode=require
Keep these connection strings handy.
Initial Project and Drizzle setup
This guide assumes you have an existing Node.js project with Drizzle ORM already configured.
If you are new to Drizzle ORM or need to set it up with Neon, please first follow the official Drizzle ORM + Neon Quickstart guide.
Your project should have the following dependencies installed:
-
drizzle-orm,drizzle-kit, and@neondatabase/serverless(Neon HTTP driver). -
tsxanddotenvinstalled as development dependencies (npm install -D tsx dotenv). -
A
schema.tsfile for your Drizzle schema definitions. -
A
.envfile in your project root containing your Neon branch connection strings:DATABASE_URL_DEVELOPMENT=YOUR_DEVELOPMENT_NEON_DIRECT_CONNECTION_STRING DATABASE_URL_PRODUCTION=YOUR_PRODUCTION_NEON_DIRECT_CONNECTION_STRINGReplace the placeholder values with your actual Neon direct connection strings which you obtained in the Retrieve Connection strings section.
Syncing Drizzle schema with an existing Database (optional)
If you have an existing database schema on a Neon branch that you want to bring into your Drizzle schema.ts file, you can use the drizzle-kit pull command. This is useful to ensure your schema.ts aligns with the actual database state before you start defining migrations.
-
Ensure your
drizzle.config.tsis configured for the target database.drizzle-kit pullwill use thedbCredentialsspecified in your Drizzle configuration file to connect to the database. It will place the generated schema files into theoutdirectory also specified in this configuration.A typical
drizzle.config.tsmight look like this:import type { Config } from 'drizzle-kit'; import 'dotenv/config'; export default { schema: './src/schema.ts', // Path to your main working schema file out: './drizzle', // `drizzle-kit pull` will place its output here. Migrations also go here. dialect: 'postgresql', dbCredentials: { url: process.env.DATABASE_URL_DEVELOPMENT!, // Use DATABASE_URL_PRODUCTION for production branch }, } satisfies Config; -
Add a
pullscript topackage.json:{ "scripts": { // ... other scripts "db:pull": "drizzle-kit pull" } }If you have separate configurations for development and production branches, you can create
drizzle.config.dev.tsanddrizzle.config.prod.tsand adjust the script accordingly. Refer to Applying Migrations to Neon Branches section for more details on how to set up these configurations.{ "scripts": { // ... other scripts "db:pull:dev": "drizzle-kit pull --config=drizzle.config.dev.ts", "db:pull:prod": "drizzle-kit pull --config=drizzle.config.prod.ts" } } -
Run the
pullcommand:npm run db:pull # If using separate configurations for branches # npm run db:pull:dev # To pull schema from development branch # npm run db:pull:prod # To pull schema from production branchDrizzle Kit will connect to the database specified in your config's
dbCredentials, read its schema, and generate corresponding Drizzle ORM schema definition files (schema.tsand potentiallyrelations.ts) inside theoutdirectory (e.g.,./drizzle/schema.ts). -
Transfer schema code to your working file:
- Navigate to the
outdirectory specified in yourdrizzle.config.ts(e.g.,./drizzle). - Locate the generated
schema.tsfile (and, if present,relations.ts) created bydrizzle-kit pull. - Copy the contents of
schema.ts(for example, from./drizzle/schema.ts). - Paste these contents into your main working schema file (such as
src/schema.ts), replacing or merging with any existing definitions as needed. - If a
relations.tsfile was generated and is relevant to your schema, integrate its contents into your project's structure accordingly.
├ 📂 drizzle
│ ├ 📂 meta
│ ├ 📜 migration.sql
│ ├ 📜 relations.ts ────────┐
│ └ 📜 schema.ts ───────────┤
├ 📂 src                    │
│ ├ 📂 db                   │
│ │ ├ 📜 relations.ts <─────┤
│ │ └ 📜 schema.ts <────────┘
│ └ 📜 index.ts
└ …
This method enables schema management according to your preferred project organization, ensuring that Drizzle ORM functionalities, such as table relations, are consistent with your current database schema.
For more details, refer to Drizzle Docs: Transfer code to your actual schema file
- Navigate to the
After this process, your src/schema.ts file will reflect the structure of your existing database branch, and you can proceed with managing future changes using Drizzle migrations.
Defining and applying Migrations
If you're defining your database schema from scratch, create it directly using Drizzle ORM syntax in your schema.ts file. Alternatively, if you've previously pulled an existing schema into schema.ts as described in Syncing Drizzle schema with an existing Database section, you can start modifying it to suit your application's needs.
Defining or Refining your schema
All schema definitions or modifications are made in your src/schema.ts file (or your chosen path, e.g., db/schema.ts as per your drizzle.config.ts) using Drizzle ORM's syntax.
For example, if you are starting a new schema or adding to an existing one, it might look like this:
import { pgTable, serial, text, timestamp, integer } from 'drizzle-orm/pg-core';

export const authors = pgTable('authors', {
  id: serial('id').primaryKey(),
  name: text('name').notNull(),
  bio: text('bio'),
  createdAt: timestamp('created_at').defaultNow().notNull(),
});

export const books = pgTable('books', {
  id: serial('id').primaryKey(),
  title: text('title').notNull(),
  authorId: integer('author_id').references(() => authors.id),
  publishedYear: integer('published_year'),
  createdAt: timestamp('created_at').defaultNow().notNull(),
});
This example defines two tables: authors and books, with a foreign key relationship between them. You can add more tables, columns, or relationships as needed.
Generating Migration files
Whenever you change your schema file (e.g., src/schema.ts), you need to generate SQL migration files that Drizzle Kit can use to apply these changes to your database.
-
Configure Drizzle for Migration generation.
You should have a
drizzle.config.tsfile in your project root. A minimaldrizzle.config.tsfor generation could be:import type { Config } from 'drizzle-kit'; import 'dotenv/config'; export default { schema: './src/schema.ts', // Path to your schema file out: './drizzle', // Output directory for migration files dialect: 'postgresql', dbCredentials: { url: process.env.DATABASE_URL_DEVELOPMENT!, // Or DATABASE_URL_PRODUCTION as needed }, } satisfies Config;Adjust
schemaandoutpaths if your project structure is different. -
Add a generation script to
package.json:{ "scripts": { // ... any existing scripts "db:generate": "drizzle-kit generate --config=drizzle.config.ts" } }Migration generation scripts are typically the same for both
developmentandproductionbranches, as their function is simply to generate SQL files based on the current schema. However, if you have specific needs, you can configure separate output directories and settings for each, which is useful for maintaining distinct migration histories or schemas.If you have separate configurations for development and production branches, you can create
drizzle.config.dev.tsanddrizzle.config.prod.tsfor development and production branches respectively, and adjust the script accordingly:{ "scripts": { // ... other scripts "db:generate:dev": "drizzle-kit generate --config=drizzle.config.dev.ts", "db:generate:prod": "drizzle-kit generate --config=drizzle.config.prod.ts" } } -
Run migration generation:
npm run db:generate
# If using seperate configurations for branches
# npm run db:generate:dev # To generate migrations for development branch
# npm run db:generate:prod # To generate migrations for production branch
This command compares your
src/schema.tswith the state recorded from previous migrations (or an empty state if it's the first time) and generates new SQL files in theoutdirectory (e.g.,./drizzle). These files contain the SQL commands needed to update your database schema.
Applying migrations to Neon Branches
You have two primary methods to apply these generated SQL migrations:
- Using Drizzle Kit's
migratecommand. - Using a custom TypeScript script for more programmatic control.
Method 1: Using drizzle-kit migrate
Drizzle Kit can apply migrations directly from the command line. To target different Neon branches (development and production), you'll use separate Drizzle configuration files, each pointing to the respective branch's connection string.
Seperate Configurations for Branches
When working with Drizzle Kit and multiple Neon branches, you have two main ways to tell Drizzle which database (branch) to use:
- Separate config files: Create a Drizzle config file for each branch (e.g.,
drizzle.config.dev.tsfor your development branch,drizzle.config.prod.tsfor production). - Single config file with environment variables: Use one Drizzle config file. In this file, get the database URL from an environment variable. You'd change this environment variable to point to different branches.
The single config method is handy if you have several environments (like development, staging, and production). You need to ensure that the environment variable is set correctly before running migrations. This can be done in your CI/CD pipeline or locally by setting the environment variable before running the command. In this guide, we use separate files because it makes the steps for each branch very clear. However, the main ideas for running migrations are the same no matter which way you set up your Drizzle configuration.
-
Create
drizzle.config.dev.tsfor thedevelopmentbranch: This configuration will useDATABASE_URL_DEVELOPMENT.// drizzle.config.dev.ts import type { Config } from 'drizzle-kit'; import 'dotenv/config'; export default { dialect: 'postgresql', schema: './src/schema.ts', // Path to your main working schema file out: './drizzle', // Directory containing migration files dbCredentials: { url: process.env.DATABASE_URL_DEVELOPMENT!, }, } satisfies Config; -
Create
drizzle.config.prod.tsfor theproductionbranch: This configuration will useDATABASE_URL_PRODUCTION.// drizzle.config.prod.ts import type { Config } from 'drizzle-kit'; import 'dotenv/config'; export default { dialect: 'postgresql', schema: './src/schema.ts', // Path to your main working schema file out: './drizzle', // Directory containing migration files dbCredentials: { url: process.env.DATABASE_URL_PRODUCTION!, }, } satisfies Config; -
Add
drizzle-kit migratescripts topackage.json:{ "scripts": { // ... other scripts "db:pull:dev": "drizzle-kit pull --config=drizzle.config.dev.ts", "db:generate:dev": "drizzle-kit generate --config=drizzle.config.dev.ts", "db:migrate:dev": "drizzle-kit migrate --config=drizzle.config.dev.ts", "db:pull:prod": "drizzle-kit pull --config=drizzle.config.prod.ts", "db:generate:prod": "drizzle-kit generate --config=drizzle.config.prod.ts", "db:migrate:prod": "drizzle-kit migrate --config=drizzle.config.prod.ts" } }Follow the Step-by-Step Migration Workflow section to learn how to apply these migrations to your
developmentandproductionbranches in a safe and structured manner.Preventing Accidental Production Migrations
You may add additional confirmation prompts for production migrations to prevent accidental changes. For example here's a simple confirmation prompt for production migrations:
{
  "scripts": {
    // ... other scripts
    "db:migrate:prod": "read -r -p 'Are you sure you want to apply migrations to PRODUCTION BRANCH? (y/N) ' response && [[ \"$response\" =~ ^[Yy]$ ]] && drizzle-kit migrate --config=drizzle.config.prod.ts || echo 'Production migration cancelled.'"
  }
}
This script will prompt the user for confirmation before applying migrations to the production branch. If the user types 'y' or 'Y', it will proceed with the migration; otherwise, it will cancel the operation.
Method 2: Using a custom migration script
For scenarios demanding finer-grained control over the migration process like implementing custom logging, executing pre/post-migration hooks (such as temporarily pausing application services), or seamlessly integrating with complex CI/CD pipelines, a custom TypeScript script leveraging Drizzle ORM's migrator functions is the recommended approach.
The script provided below serves as a practical starting point. It outlines a basic structure that you can easily adapt and enhance with custom logging, error handling, and other logic specific to your migration workflow.
-
Create
src/migrate.ts:import { drizzle } from 'drizzle-orm/neon-http'; import { neon } from '@neondatabase/serverless'; import { migrate } from 'drizzle-orm/neon-http/migrator'; import 'dotenv/config'; async function runMigrations(databaseUrl: string | undefined, branchNameForLog: string) { if (!databaseUrl) { console.error(`Error: Connection string for ${branchNameForLog} branch is not defined.`); console.error( `Please ensure DATABASE_URL_${branchNameForLog.toUpperCase()} is set in your .env file.` ); process.exit(1); } const sql = neon(databaseUrl); const db = drizzle(sql); console.log(`Applying migrations to ${branchNameForLog} branch...`); try { await migrate(db, { migrationsFolder: './drizzle' }); // Ensure this path matches your 'out' directory console.log(`Migrations applied successfully to ${branchNameForLog} branch.`); } catch (error) { console.error(`Error applying migrations to ${branchNameForLog} branch:`, error); process.exit(1); } } async function main() { const targetBranchArg = process.argv[2]?.toLowerCase(); // Expect 'development' or 'production' if ( !targetBranchArg || (targetBranchArg !== 'development' && targetBranchArg !== 'production') ) { console.error('Invalid target branch specified.'); console.error('Usage: npm run db:migrate:<dev|prod>:script'); process.exit(1); } let dbUrl; let branchNameForLog; if (targetBranchArg === 'development') { dbUrl = process.env.DATABASE_URL_DEVELOPMENT; branchNameForLog = 'Development'; } else { // 'production' dbUrl = process.env.DATABASE_URL_PRODUCTION; branchNameForLog = 'Production'; } await runMigrations(dbUrl, branchNameForLog); } main(); -
Add custom script migration commands to
package.json:{ "scripts": { // ... other scripts (generate, pull) "db:migrate:dev:script": "tsx ./src/migrate.ts development", "db:migrate:prod:script": "tsx ./src/migrate.ts production" } }
The Step-by-step migration workflow
Depending on your workflow, you can choose to use either the Drizzle Kit migration commands or the custom script method. The steps below outline the general process for applying schema changes using either method.
To maintain a clean and safe migration process between your development and production branches, follow these steps:

- Modify schema: Make your desired changes in your schema file (e.g.,
src/schema.ts). - Generate migrations: Run
npm run db:generate. This creates new SQL files in youroutdirectory (e.g.,./drizzle). - Apply to
developmentbranch: Choose one of your configured methods:- Using Drizzle Kit:
npm run db:migrate:dev - Using custom script:
npm run db:migrate:dev:script
- Using Drizzle Kit:
- Verify on
development:- Thoroughly test the changes on your
developmentbranch. - Connect using psql, the Neon SQL Editor, or your preferred DB tool to inspect the schema and data.
- If your application connects to this branch for development, test its functionality.
- Run any relevant test suites against the
developmentbranch.
- Thoroughly test the changes on your
- Apply to
productionbranch: Once confident that the migrations are correct, safe, and tested:- Using Drizzle Kit:
npm run db:migrate:prod - Using custom script:
npm run db:migrate:prod:script - For enhanced reliability and consistency, integrate this migration task into your CI/CD pipeline. This automates the application of migrations during deployments, significantly reducing the need for manual, error-prone changes to your production database.
- Using Drizzle Kit:
- Verify on
production: Perform checks on yourproductionenvironment to ensure the schema was updated as expected and that your application remains healthy.
Handling subsequent schema changes
The workflow described above (Modify Schema -> Generate Migrations -> Apply to Dev -> Verify on Dev -> Apply to Prod -> Verify on Prod) should be repeated for every new set of schema modifications. This ensures that each change is isolated, tested, and safely deployed without impacting the stability of your production environment.
To further enhance your development and testing lifecycle, consider extending this branching model. Utilize dedicated branches for individual developers (e.g., dev1, dev2), QA teams (qa), or staging environments (staging). This approach provides even greater isolation for changes and allows for thorough testing before features are promoted to production.
Neon branches enhance your Drizzle migration workflow without the cost of full database duplication. Billing is based on unique data storage. If you create a development branch from a 10 GB production branch, it initially shares the same data. As you introduce schema changes and add data to development (say, 1 GB of new or modified data), only this delta contributes to additional storage costs (totaling 11 GB in this example). This model replaces the cumbersome and costly traditional setup of maintaining separate database servers, manually keeping them in sync, and navigating the complexities of migrating across these isolated instances.
Advanced strategies for managing schema evolution
Beyond the workflow, Neon's branching capabilities, combined with strategic practices, can further optimize your schema migration process, especially for complex changes or long-lived development cycles.
Keeping Branches Fresh and Aligned
Over time, your development branch can diverge significantly from production, or accumulate a long history that might become less relevant. Neon's Reset from parent feature allows you to reset a branch to its parent state, effectively bringing it back in line with the latest production schema and data.
Why reset your development branch?
- Start fresh for new features: Before beginning a significant new feature or a complex schema change, resetting your
developmentbranch fromproductionensures you're working against the most current production schema and data. This avoids conflicts or surprises later in the development cycle. - Prevent history window issues: Neon retains a history of changes (Write-Ahead Logs or WAL) for each branch, enabling features like Point-in-Time Restore. For long-lived development branches with many changes, this history can grow. While Neon manages storage efficiently, resetting a development branch effectively starts its history anew from the parent's current state. This can be useful if a branch's history is no longer needed or if you want to ensure it's within a more recent recovery window relative to its new baseline.
- Simplify and clean up: If a development branch has gone through many experimental changes or aborted features, a reset provides a clean slate, making it easier to manage.
- Maintain a consistent baseline for testing: For QA or staging branches, regularly resetting them from
productionensures that testing is always performed against a known, reliable baseline that accurately reflects the production environment.
How to use "Reset from Parent"
You can reset a branch using the Neon Console or the Neon CLI. For example, to reset your development branch:
neonctl branches reset development --parent production --project-id <project id>Replace
<project id>with your actual Neon project ID. You can find this in the Neon Console under your project's settings.
Impact of Resetting
When you reset a branch:
- The branch's current schema and data are completely replaced with the latest schema and data from its parent.
- Any unmerged changes or unique data on the child branch will be lost. Ensure you have committed any necessary schema changes to your Drizzle migration files and applied them to other relevant branches if needed before resetting.
- The connection string for the reset branch remains the same, simplifying application configuration.
- Existing connections will be temporarily interrupted for the
developmentbranch during the reset process.
Implementing Zero-Downtime complex migrations with the Expand-Contract Pattern
Some schema changes are inherently "breaking" if applied directly – for example, renaming a critical table or column, changing a column's data type in an incompatible way, or splitting a column into multiple new ones. Applying such changes directly to a live production database can lead to downtime or errors as your application might temporarily be incompatible with the schema.
The Expand-Contract pattern (also known as parallel change) is a robust strategy to perform these types of complex schema migrations with zero or minimal downtime. It involves a series of phased, backward-compatible changes to both your database schema and application code.
The pattern generally involves these phases:
-
Expand (Phase 1 - Additive Changes):
- Schema: Add the new schema elements (new tables, new columns) alongside the old ones. For example, if renaming
users.email_addresstousers.email, you would add the newemailcolumn but keepemail_addressfor now. New columns should typically be nullable or have a default value to not break existing write operations. - Application: Modify your application code to write to both the old and new schema elements (dual writes). It should continue to read from the old schema element as the source of truth. This ensures data consistency during the transition.
- Data Backfill: Migrate existing data from the old schema elements to the new ones. This can be a one-time script or a background process.
- Schema: Add the new schema elements (new tables, new columns) alongside the old ones. For example, if renaming
-
Migrate (Phase 2 - Shift Read Source):
- Application: Update your application code to read from the new schema elements. Writes continue to go to both old and new elements.
- Verification: Thoroughly test that the application works correctly with the new schema elements as the read source.
-
Contract (Phase 3 - Cleanup):
- Application: Modify your application code to stop writing to the old schema elements. Now, reads and writes only use the new schema.
- Schema: Remove the old, now unused, schema elements (old tables, old columns) from your database. This is a Drizzle migration that drops the old structures.
How Neon Branches support the Expand-Contract Pattern
Neon branches significantly simplify testing and validating each phase of an Expand-Contract migration:
- Isolated Phase Testing: You can perform each schema change (e.g., adding a new column, backfilling data, dropping an old column) on your
developmentbranch (or a dedicated feature branch). - Application compatibility checks: Deploy application code changes corresponding to each phase against this development branch to ensure compatibility.
- Staging validation: Before applying changes to
production, you can use astagingbranch (which could be a reset ofproduction+ the current migration phase) to perform end-to-end testing.
Example scenario
Let's consider a scenario where you need to rename a column in your books table from published_year to publication_year. This is a breaking change that requires careful handling to avoid downtime or data loss.
Preparation
- You have your
productionNeon branch. - You have a
developmentNeon branch (ideally recently reset fromproductionor a fresh branch for this feature). - Your application has separate deployment environments (e.g., a
devorstagingenvironment pointing to yourdevelopmentNeon branch, and aproductionenvironment pointing to yourproductionNeon branch).
You can now test the full Expand-Contract cycle on your development branch and application environment before promoting to production.
Expand Phase (on development branch & dev app environment)
-
Schema change: In your
schema.ts, add the newpublication_year DATEcolumn to thebookstable.import { pgTable, serial, text, timestamp, integer } from 'drizzle-orm/pg-core'; export const authors = pgTable('authors', { id: serial('id').primaryKey(), name: text('name').notNull(), bio: text('bio'), createdAt: timestamp('created_at').defaultNow().notNull(), }); export const books = pgTable('books', { id: serial('id').primaryKey(), title: text('title').notNull(), authorId: integer('author_id').references(() => authors.id), publishedYear: integer('published_year'), publicationYear: integer('publication_year'), createdAt: timestamp('created_at').defaultNow().notNull(), }); -
Generate & apply migration:
npm run db:generate
npm run db:migrate:dev
This applies the "add column" migration to your
developmentNeon branch. -
Application code update (dev version):
- Modify your application code so that when creating or updating a book, it writes the date to both the old
published_yearand the newpublication_yearcolumns. - Ensure all read operations for this date still use the old
published_yearcolumn as the source of truth.
- Modify your application code so that when creating or updating a book, it writes the date to both the old
-
Deploy & test (dev application): Deploy this updated application version to your
devenvironment (pointing to thedevelopmentNeon branch). Test create/update operations and verify data is written to both columns. Verify reads are still correct. -
Data Backfill (on
developmentbranch): Run a script against yourdevelopmentNeon branch to populate the newpublication_yearcolumn for all existing books:UPDATE books SET publication_year = published_year;
Verify the backfill on the development branch.
Migrate Phase (on development branch & dev app environment)
- Modify your application code to now read from the new
publication_yearcolumn. - Writes should ideally continue to go to both
published_yearandpublication_yearfor a period to ensure data integrity and easier rollback during this phase if needed. Alternatively, if confident, writes could switch to only the new column. - Deploy & Test (dev application): Deploy this updated application version to your
devenvironment. Thoroughly test all functionalities that read or display this date. Ensure data consistency.
Contract phase (on development branch & dev app environment)
-
Modify your application code to stop writing to the old
published_yearcolumn. All reads and writes now exclusively usepublication_year. -
Deploy & test (dev application): Deploy this application version to your
devenvironment. Confirm all operations work as expected using only the new column. -
Schema shange: In
schema.ts, remove the oldpublished_yearcolumn from thebookstable.import { pgTable, serial, text, timestamp, integer } from 'drizzle-orm/pg-core'; export const authors = pgTable('authors', { id: serial('id').primaryKey(), name: text('name').notNull(), bio: text('bio'), createdAt: timestamp('created_at').defaultNow().notNull(), }); export const books = pgTable('books', { id: serial('id').primaryKey(), title: text('title').notNull(), authorId: integer('author_id').references(() => authors.id), publishedYear: integer('published_year'), publicationYear: integer('publication_year'), createdAt: timestamp('created_at').defaultNow().notNull(), }); -
Generate & apply migration:
npm run db:generate
npm run db:migrate:dev
This applies the "drop column" migration to your
developmentNeon branch. -
Final Test (dev application): Re-test your application thoroughly in the
devenvironment to ensure everything functions correctly after the old column is dropped.
Rolling out validated changes to production (Phased approach)
Once the entire Expand-Contract cycle (all schema changes and corresponding application code updates for each phase) has been successfully validated on your development branch and dev application environment, you can proceed to roll out these changes to production in the same phased manner. Each step involves deploying a corresponding production-ready version of your application code alongside the schema migration.
Here's an illustrated diagram of the Expand-Contract pattern with Neon branches:

While the Expand-Contract pattern requires more distinct steps and careful coordination between schema and application changes, it is invaluable for maintaining uptime and data integrity during significant schema changes in live production systems. Drizzle helps manage the schema definition and SQL migration generation for each database step, and Neon branches provide the safe, isolated environments essential for testing these intricate transitions thoroughly before they reach production.
Conclusion
Using Neon's database branching with Drizzle ORM offers a powerful and safe methodology for managing your PostgreSQL schema migrations. By systematically developing and testing schema changes on an isolated development branch before applying them to your production environment, you significantly reduce deployment risks and ensure a smoother evolution of your application's database backend.
For a more streamlined development workflow, explore Neon's capability to create database branches for each Pull Request (PR). You can automate the entire lifecycle of these ephemeral branches from creation and applying Drizzle schema migrations for testing, to their eventual deletion using GitHub Actions or your preferred CI/CD pipeline. This ensures each PR is tested against an isolated, correctly migrated database. Discover how to set up the branching automation in our guide: Automate branching with GitHub Actions.
Resources
- Drizzle ORM Documentation
- Migrations with Drizzle Kit
- Drizzle with Neon Postgres
- Neon Branching Documentation
- Neon Serverless Driver
Need help?
Join our Discord Server to ask questions or see what others are doing with Neon. Users on paid plans can open a support ticket from the console. For more details, see Getting Support.